Introduction to Peanut Butter Oat Cups
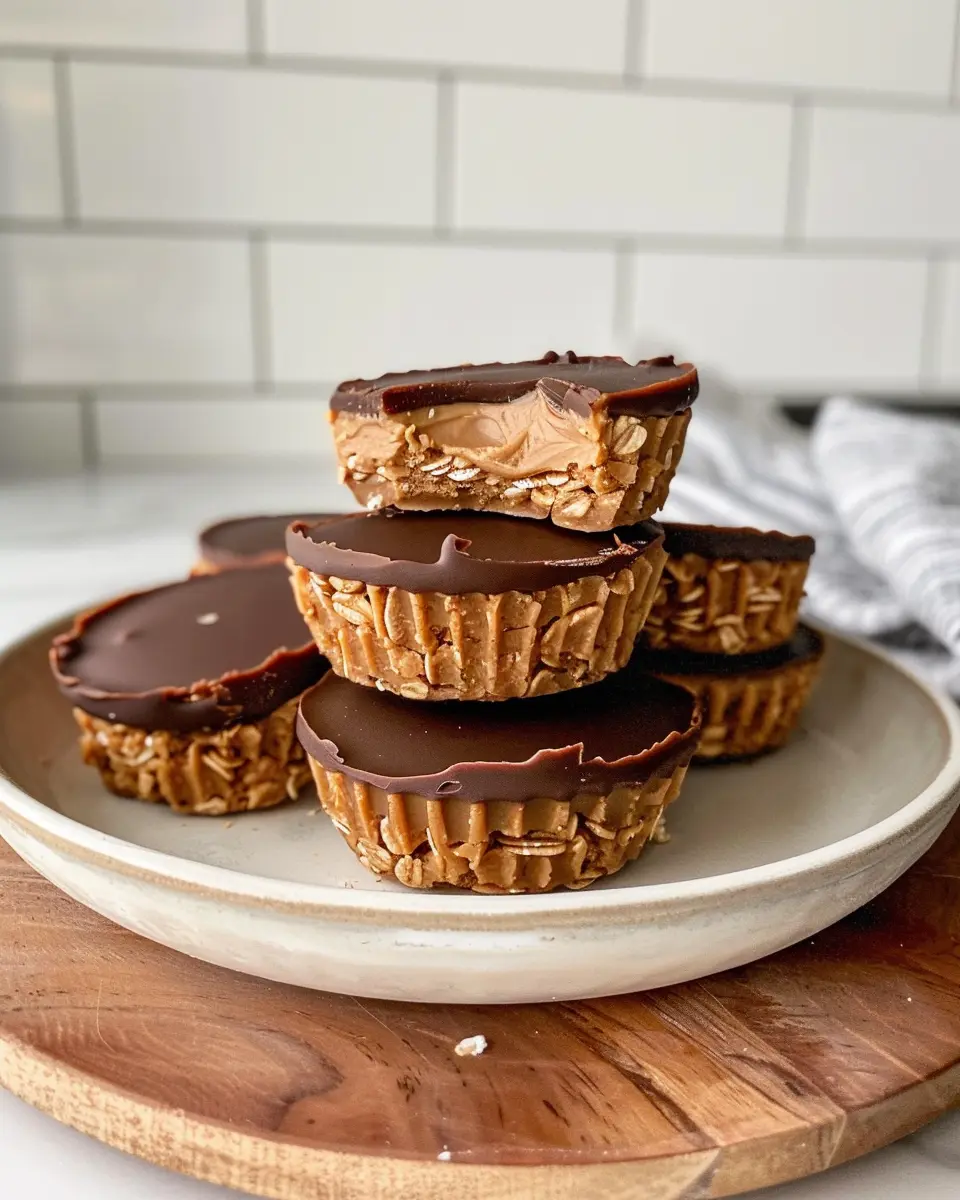
Are you searching for a go-to snack that’s as nourishing as it is delicious? Let me introduce you to peanut butter oat cups! These delightful little bites are not just tasty; they are a powerhouse of nutrition, hitting that sweet spot between indulgence and health. Imagine sinking your teeth into a soft, chewy blend of creamy peanut butter, hearty oats, and a hint of natural sweetness. Trust me, they’re as good as they sound.
Why Peanut Butter Oat Cups are the Perfect Snack
What sets peanut butter oat cups apart from your standard store-bought snacks? For starters, they are incredibly easy to make and customize. With just a handful of ingredients (most of which you likely have in your pantry), you can whip up a batch in no time.
Here’s why you should consider adding these delicious cups to your snack routine:
-
Nutritious Ingredients: The combination of oats and peanut butter offers a good dose of fiber and protein, making them a filling option. According to the American Heart Association, oats can contribute to heart health and manage cholesterol levels.
-
Energy Boost: Peanut butter is known for its sustained energy release, perfect for young professionals like us who need to power through busy workdays. Pair these cups with some fruit for an extra boost.
-
Versatile and Customizable: Whether you prefer dark chocolate chips, dried fruits, or a sprinkle of cinnamon, the variations are endless. You can easily adapt the recipe to cater to your taste preferences or dietary needs.
-
Great for Meal Prep: These oat cups are ideal for busy weeks ahead. Make a batch on Sunday, and you’ll have a ready-to-go snack to grab before heading out or during those afternoon slumps.
So why not treat yourself to a snack that’s both satisfying and simple? If you’re looking for a healthy yet indulgent option, peanut butter oat cups might just become your new favorite recipe. Ready to dive into the details? Let’s get started with the recipe!
Ingredients for Peanut Butter Oat Cups
When it comes to creating delicious and nutritious peanut butter oat cups, choosing the right ingredients is essential. Let’s break down what you’ll need to make these tasty treats!
Essential Ingredients for the Base
To build the perfect base for your peanut butter oat cups, you’ll want to gather the following ingredients:
- Rolled oats: These are the backbone of the recipe, providing texture and fiber.
- Peanut butter: Opt for natural, unsweetened peanut butter to keep it healthy and rich in flavor.
- Honey or maple syrup: Both work wonderfully as sweeteners, giving just the right amount of sweetness.
- Banana: This not only adds natural sweetness but also moistens the mixture.
- Chia seeds or flaxseeds: These tiny powerhouses are loaded with nutrients and help bind ingredients together.
- Salt: A pinch enhances all the flavors and balances the sweetness.
Optional Ingredients for Toppings
Feel free to customize your peanut butter oat cups with a range of toppings to elevate their flavor:
- Dark chocolate chips: For a touch of indulgence, sprinkle some on top.
- Nuts or seeds: Chopped almonds or sunflower seeds add crunch.
- Dried fruits: Raisins, cranberries, or apricots introduce a delightful chewiness.
These simple ingredients come together to create a snack that’s not just delicious but also packed with nutrients. For more inspiration on healthy ingredients, check out sources like Healthline for nutritional benefits. Happy cooking!
Step-by-Step Preparation of Peanut Butter Oat Cups
Making peanut butter oat cups is not just easy; it’s a fun, delightful way to satisfy your sweet tooth while keeping things health-conscious. As you prepare, think of this as a bonding time not just with your kitchen but also with the delicious treats you are about to create. Let’s get started!
Gather Your Ingredients
First things first: before diving into the preparation, make sure you have everything on hand. Here’s a quick checklist of the essentials you need for your peanut butter oat cups:
- 2 cups rolled oats
- 1 cup natural peanut butter (smooth or chunky based on preference)
- 1/4 cup honey or maple syrup
- 1/2 teaspoon vanilla extract
- 1/4 teaspoon salt
- Optional toppings: mini chocolate chips, chopped nuts, or dried fruits
Having these ingredients ready not only streamlines the process but also helps you enjoy each step without the last-minute grocery dash. You want everything within arm’s reach!
Mix the Oat Cup Base
Once you have your ingredients, it’s time to create the oat base. In a large mixing bowl, combine the rolled oats, peanut butter, honey (or maple syrup), vanilla extract, and salt.
- Mix well: Use a spatula or your hands to ensure everything is evenly combined. You should end up with a sticky, somewhat dense mixture that holds together nicely.
If you’re looking to boost the nutritional content, feel free to toss in some chia seeds or ground flaxseeds. These small additions pack a mighty punch of omega-3s!
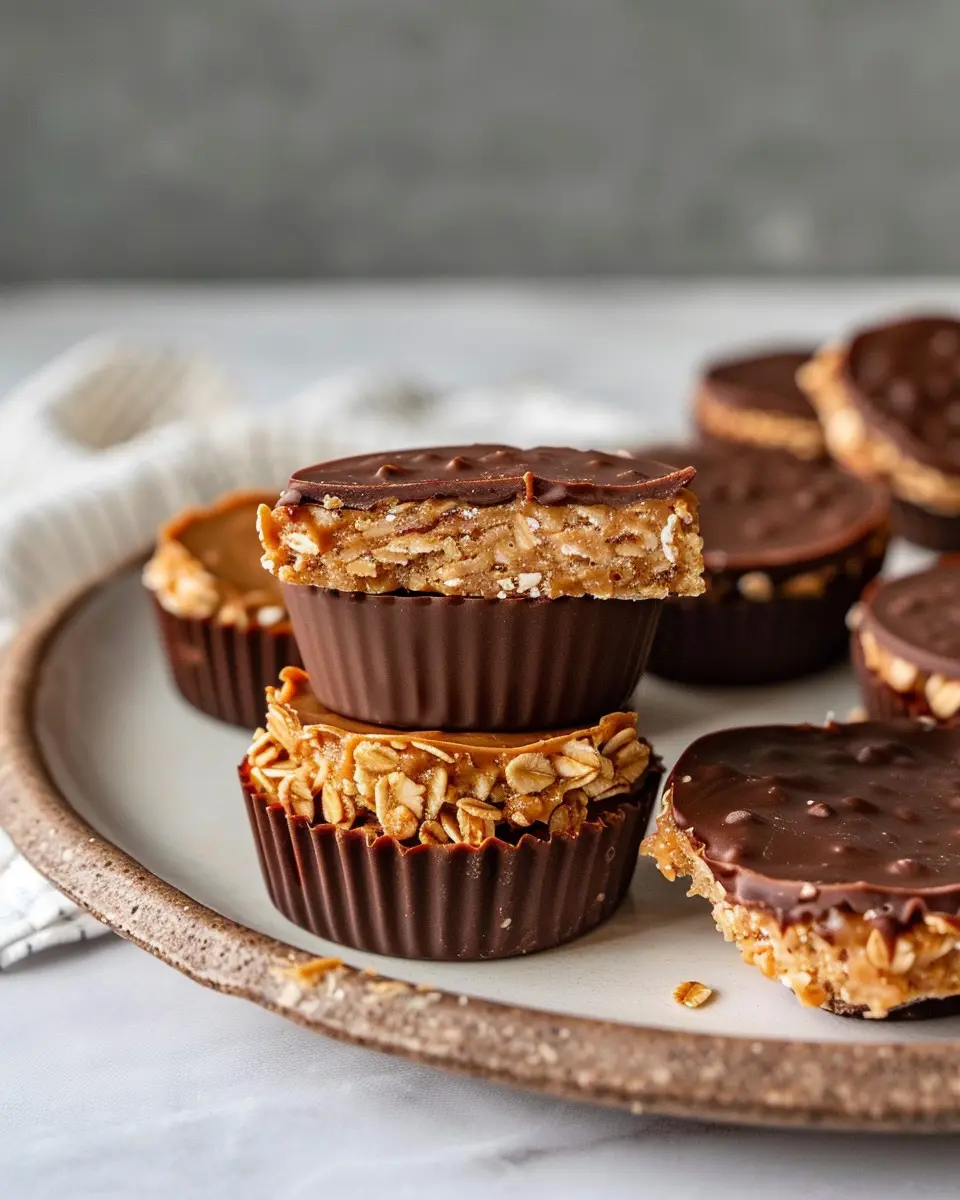
Form the Oat Cups
Now comes the fun part! Grab a muffin tin and lightly grease it with cooking spray or line it with cupcake liners.
- Portion it out: Take a handful of the oat mixture and press it into the bottom of each muffin cup, creating a small well in the center. You want a sturdy base with enough depth to hold the peanut butter layer without spilling over.
Make sure to pack the mixture tightly—this will ensure your peanut butter oat cups hold their shape once baked!
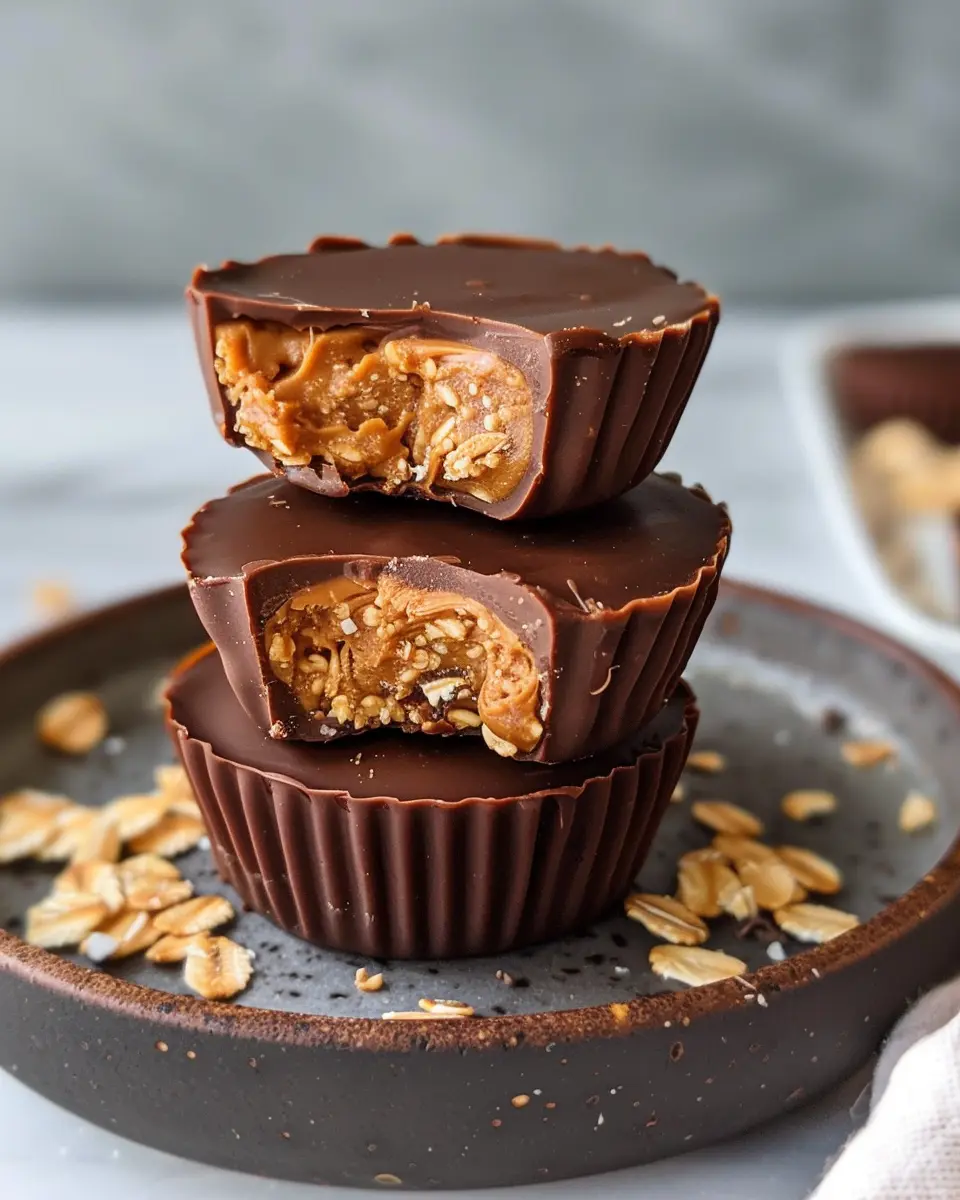
Add the Peanut Butter Layer
With your oat cups shaped, it’s time to drizzle in some more peanut butter.
- Fill the wells: Add a spoonful of peanut butter to the center of each oat cup. For a little variety, you can mix in other nut butters or even add a sprinkle of cinnamon to the peanut butter for an extra kick.
This layer is what brings those street cred points, offering a creamy contrast to the chewy oat base.
Melt the Chocolate Coating
Who can resist a delectable chocolate layer? In a microwavable bowl, gently melt your favorite dark or milk chocolate (about 1 cup should do).
- Tips for melting: Heat it in 30-second intervals, stirring in between to ensure it doesn’t burn. Once fully melted, take a moment to let the chocolate cool slightly.
This step adds a little indulgence to your peanut butter oat cups, creating a delicious finishing touch.
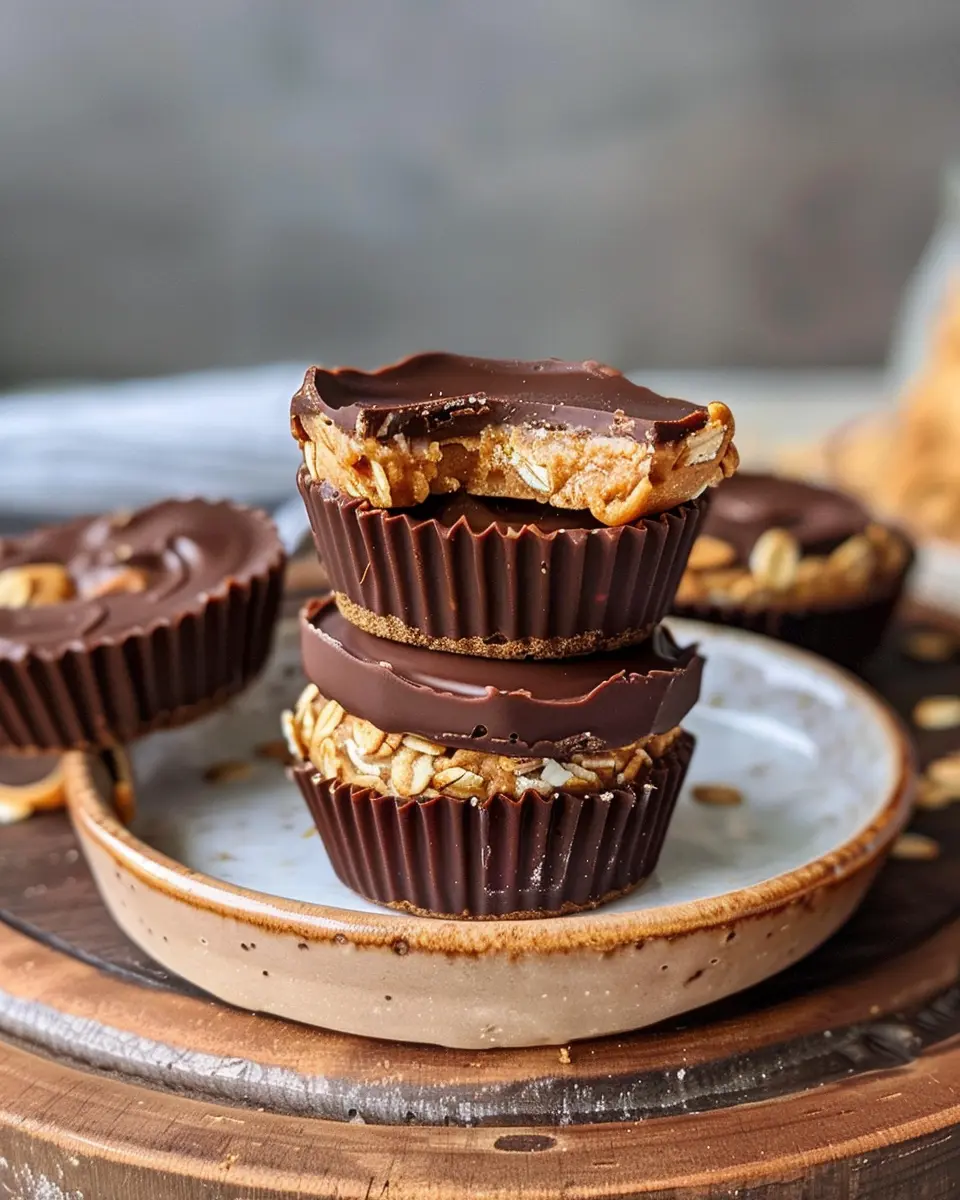
Assemble and Freeze the Cups
Finally, the moment of assembly has arrived! Take your melted chocolate and pour it over the filled oat cups, ensuring each one gets a generous topping. Afterward:
- Freeze for perfection: Place the muffin tin in the freezer for about 30-60 minutes. This will give the chocolate a chance to set and harden, sealing in all those tasty layers.
Once they’re ready, gently pop the cups out of the tin, and voilà—your peanut butter oat cups are ready to enjoy! You can store them in an airtight container in the fridge for up to a week or keep them in the freezer for when that snack craving hits.
With just these simple steps, you’ll have created a nutritious, satisfying treat that’s perfect for any time of the day. So, put on that apron, get your hands a little messy, and enjoy the process of creating these delightful morsels!
Variations of Peanut Butter Oat Cups
Peanut butter oat cups are not just a treat; they’re a canvas for your creativity! Once you’ve mastered the base recipe, you can easily tweak it to fit your taste or dietary needs. Let’s explore some fun variations!
Energy-Boosting Protein Variations
For those busy days when you need an extra kick, try adding protein-rich ingredients. Consider:
- Protein Powder: Mix in your favorite vanilla or chocolate protein powder to amp up the protein content. Just be sure to adjust the liquid measurements slightly!
- Greek Yogurt: Swapping out some of the peanut butter for Greek yogurt can add protein and keep your oat cups moist. Plus, it introduces a lovely tanginess.
- Nuts and Seeds: Toss in some chopped almonds, walnuts, or chia seeds. These not only provide a protein boost but also offer healthy fats and crunch.
Fun Flavor Additions
Why stop at plain peanut butter? Explore delightful flavor combinations that will make your mouth water:
- Chocolate Chip Delight: Stir in dark or dairy-free chocolate chips for that sweet tooth satisfaction. Dark chocolate has various health benefits, making this addition a guilt-free pleasure.
- Banana Bliss: Mashed ripe bananas can enhance the sweetness and add moisture. This little swap is perfect for those who love fruit-based snacks.
- Spices and Extracts: A dash of cinnamon, nutmeg, or even a splash of vanilla extract can transform your oat cups into a cozy treat. Each spice brings its unique health benefits and warmth.
With these variations, your peanut butter oat cups can become an entirely different experience every time you whip them up! For more on the nutritional benefits of oats, check out the Whole Grains Council’s insights on whole grains. Happy baking!
Cooking Tips and Notes for Peanut Butter Oat Cups
Best Practices for Consistency
When making peanut butter oat cups, achieving the right texture is key. Here are some handy tips to ensure your cups come out perfectly every time:
- Use Old-Fashioned Oats: They provide a better texture than quick oats or instant oats. Old-fashioned oats hold their shape and create a delightful chewiness.
- Measure Accurately: Precision is crucial! Too much peanut butter might make the mixture too wet, while too little can lead to dry cups. Consider using a kitchen scale for accuracy.
- Let Them Cool: Allow your cups to cool completely in the pan before removing them. This step helps them set and prevents crumbling.
Substitution Options for Diet Preferences
Adapting your peanut butter oat cups to fit various dietary restrictions is simple:
- Nut-Free: Swap out peanut butter for sunflower seed butter or tahini to cater to nut allergies.
- Vegan: Use maple syrup instead of honey for a plant-based sweetener.
- Gluten-Free: Ensure that your oats are certified gluten-free. This allows those with gluten sensitivities to enjoy them too.
Feel free to experiment with your favorite add-ins! For more ideas on substitutions, check out this helpful resource from Healthline. Cooking should be fun—adjust the recipe to perfectly fit your taste and needs. Happy baking!
Serving Suggestions for Peanut Butter Oat Cups
Creative Ways to Enjoy Them
Peanut butter oat cups are not just a healthy snack; they’re a canvas for your creativity! Enjoy them as a quick breakfast option by topping them with Greek yogurt and fresh berries. You can also drizzle a bit of honey or maple syrup for added sweetness. Craving something crunchier? Try sprinkling some granola or chopped nuts on top to enhance the texture. For a decadent dessert, melt a few dark chocolate chips and pour them over the cups. They’ll transform into a treat that satisfies any sweet tooth.
Pairing With Other Healthy Snacks
To create a well-rounded snack or light meal, consider pairing your peanut butter oat cups with other nutritious options. Fresh fruit, such as sliced bananas or apple wedges, complements the rich flavors beautifully. Pairing with a small serving of turkey bacon or chicken ham can add protein, making your snack more filling. For an energy boost, enjoy them alongside a smoothie packed with greens and chia seeds. These combinations not only taste delightful but also enhance your nutrient intake. Want more ideas? Check out this guide on healthy snack pairings!
Time Breakdown for Peanut Butter Oat Cups
Preparation Time
Getting started with your peanut butter oat cups is a breeze! You’ll need about 15 minutes to gather your ingredients and mix everything together. Make sure to have your oats, peanut butter, and sweeteners ready, and you’ve got this handled.
Freezing Time
Once you’ve filled your muffin tins, it’s time to chill out! The peanut butter oat cups should freeze for at least 30 minutes to set properly. This step is crucial for that perfect texture you’ll love.
Total Time
All in all, you’re looking at around 45 minutes from start to finish. Perfect for a quick snack prep on a Sunday afternoon. You can even double the batch and have healthy treats for the week! Interested in more quick recipes? Check out this article for more inspiration.
Nutritional Facts for Peanut Butter Oat Cups
Caloric Content
Peanut butter oat cups are not only a delicious treat but also a smart choice for those mindful of their caloric intake. Each cup contains approximately 150-200 calories, depending on the specific ingredients used. This makes it an ideal snack or breakfast option that fits seamlessly into many eating plans. If you’re watching your calories, consider adjusting the amount of peanut butter or sweeteners to suit your dietary goals.
Protein and Fiber Breakdown
When it comes to nutrition, the peanut butter oat cups shine with their impressive nutrient profile. Each cup packs about 5-6 grams of protein, with the wholesome oats contributing to its fiber content of around 2-3 grams per cup. Protein is essential for muscle repair and growth, while fiber aids in digestion and keeps you feeling full longer. Incorporating these into your diet can lead to better overall health; for more information on protein needs, check out resources like the Academy of Nutrition and Dietetics.
Whether you’re prepping for a busy week or just craving a tasty treat, peanut butter oat cups are an excellent choice that won’t compromise your nutritional goals. Make sure to enjoy them fresh, or store them in an airtight container for up to a week for a quick snack option.
FAQs About Peanut Butter Oat Cups
Curious about making peanut butter oat cups? Let’s tackle some frequently asked questions that might pop up as you whip up this tasty treat!
Can I make these oat cups gluten-free?
Absolutely! To create delicious gluten-free peanut butter oat cups, just make sure to choose gluten-free oats. These are widely available in stores and provide the same great texture and flavor as regular oats. Just check the label to ensure they’re processed in a gluten-free facility if you’re particularly sensitive.
How long do peanut butter oat cups last in the fridge?
Once your peanut butter oat cups are chilled and set, they are best enjoyed fresh but can last in the fridge for about 4-5 days. Just store them in an airtight container to keep them fresh. If you want them to last longer, consider freezing them! They can typically last in the freezer for up to 3 months—just thaw them overnight in the fridge before indulging!
Can I substitute peanut butter with other nut butters?
Definitely! While peanut butter gives these cups a rich flavor, feel free to swap it out for your favorite nut butter. Almond butter, cashew butter, or sunflower seed butter work wonderfully, especially for those with peanut allergies. Each nut butter brings its unique taste and nutritional benefits, so experiment and find what you love most!
For more tips on customizing your recipes, check out this helpful guide on nut butter substitutes. Happy baking!
Conclusion on Peanut Butter Oat Cups
Recap of Their Health Benefits and Versatility
In summary, peanut butter oat cups are more than just a delicious treat; they’re a powerhouse of nutrition. Packed with protein, healthy fats, and fiber, these delightful bites can fuel your busy day or serve as a satisfying snack. Their versatility is another bonus—feel free to customize them with your favorite add-ins, like fruits or nuts, to suit your taste.
Whether you’re aiming for a quick breakfast option or a midday pick-me-up, these oat cups fit the bill perfectly. Try making a batch for meal prep and see how they can simplify your week!
For more ideas on healthy snacking or meal prepping, don’t hesitate to check out resources like Healthline or EatingWell.
PrintPeanut Butter Oat Cups: Easy, Nutritious Treats for Everyone
These Peanut Butter Oat Cups are a delicious and healthy snack that everyone can enjoy.
- Prep Time: 10 minutes
- Cook Time: 0 minutes
- Total Time: 40 minutes
- Yield: 16 cups
- Category: Snacks
- Method: No-bake
- Cuisine: American
- Diet: Vegetarian
Ingredients
- 2 cups rolled oats
- 1 cup peanut butter
- 1/2 cup honey
- 1 teaspoon vanilla extract
- 1/4 teaspoon salt
Instructions
- In a large bowl, mix together the rolled oats, peanut butter, honey, vanilla extract, and salt until well combined.
- Press the mixture firmly into a lined 9×9 inch baking dish.
- Chill in the refrigerator for about 30 minutes.
- Once set, cut into bars or squares.
- Enjoy as a nutritious snack!
Notes
- For a chocolate version, add in some chocolate chips.
- These can be stored in an airtight container for up to a week.
Nutrition
- Serving Size: 1 cup
- Calories: 200
- Sugar: 10g
- Sodium: 50mg
- Fat: 10g
- Saturated Fat: 2g
- Unsaturated Fat: 5g
- Trans Fat: 0g
- Carbohydrates: 20g
- Fiber: 3g
- Protein: 6g
- Cholesterol: 0mg